Building a banjo, part 3: cutting and gluing
Note: this is a revised version of the guide intended for when I teach. It’s organized by time so that some of these jobs can overlap.s
Starting out
You should have your tools and wood. As a reminder, here are the wood needs. In my spring 2022 Turning Points class, we will be using poplar for the rim and neck and ipe for the fingerboard. Poplar is a pretty soft hardwood, so it’s not ideal, but it it’s far easier to work with for that same reason. Ipe is used for decking and flooring. It works well as a cheaper substitute for more standard fingerboard woods like ebony, rosewood, and other exotic species.
- Rim: 16 linear feet, 2” wide, 1” thick for 3ish board feet
- Neck: 8 linear feet, 4” wide, 1” thick for 3ish board feet
- Fingerboard: 4 linear feet, 4” wide, 1/4” thick for 1.5ish (at 1” thick, but I look for 1/4” pieces)
We’ll start by cutting and gluing the neck, then the rim, then the fingerboard.
Building the neck
Time to build a neck. It’s hard to do this first because your scale length (the distance from the nut to the bridge) will depend on the final size of your rim. That matters far more, though, if you are adding frets. Since this is fretless and we’re moving quickly, we are going to do this first so that we can let it dry and get the fingerboard on sooner. If you are doing this on your own, or you’re willing to come in and work on it a few more days each week, I’d do the rim first, then the neck, then the fingerboard so that your measurements can work out just right.
Measuring the pieces
We’re going to cut the 4” wide piece of 1” thick wood into smaller pieces to make the neck. It may not actually be an inch thick, which is fine.
The first step is deciding on a scale length. The scale length is the distance between the nut of the banjo and the bridge. Deciding your scale length will determine the length of the neck. It’s usually 26 to 27 inches. If you like your current banjo, go ahead and measure it. We’ll use this number to calculate one of our cuts.
Here’s a detailed overview of what we’re doing. Pardon my handwriting: I’ll reiterate everything below. This also labels the parts of the neck (peghead, heel, and dowel stick) so that there’s no confusion. This is very much not to scale.
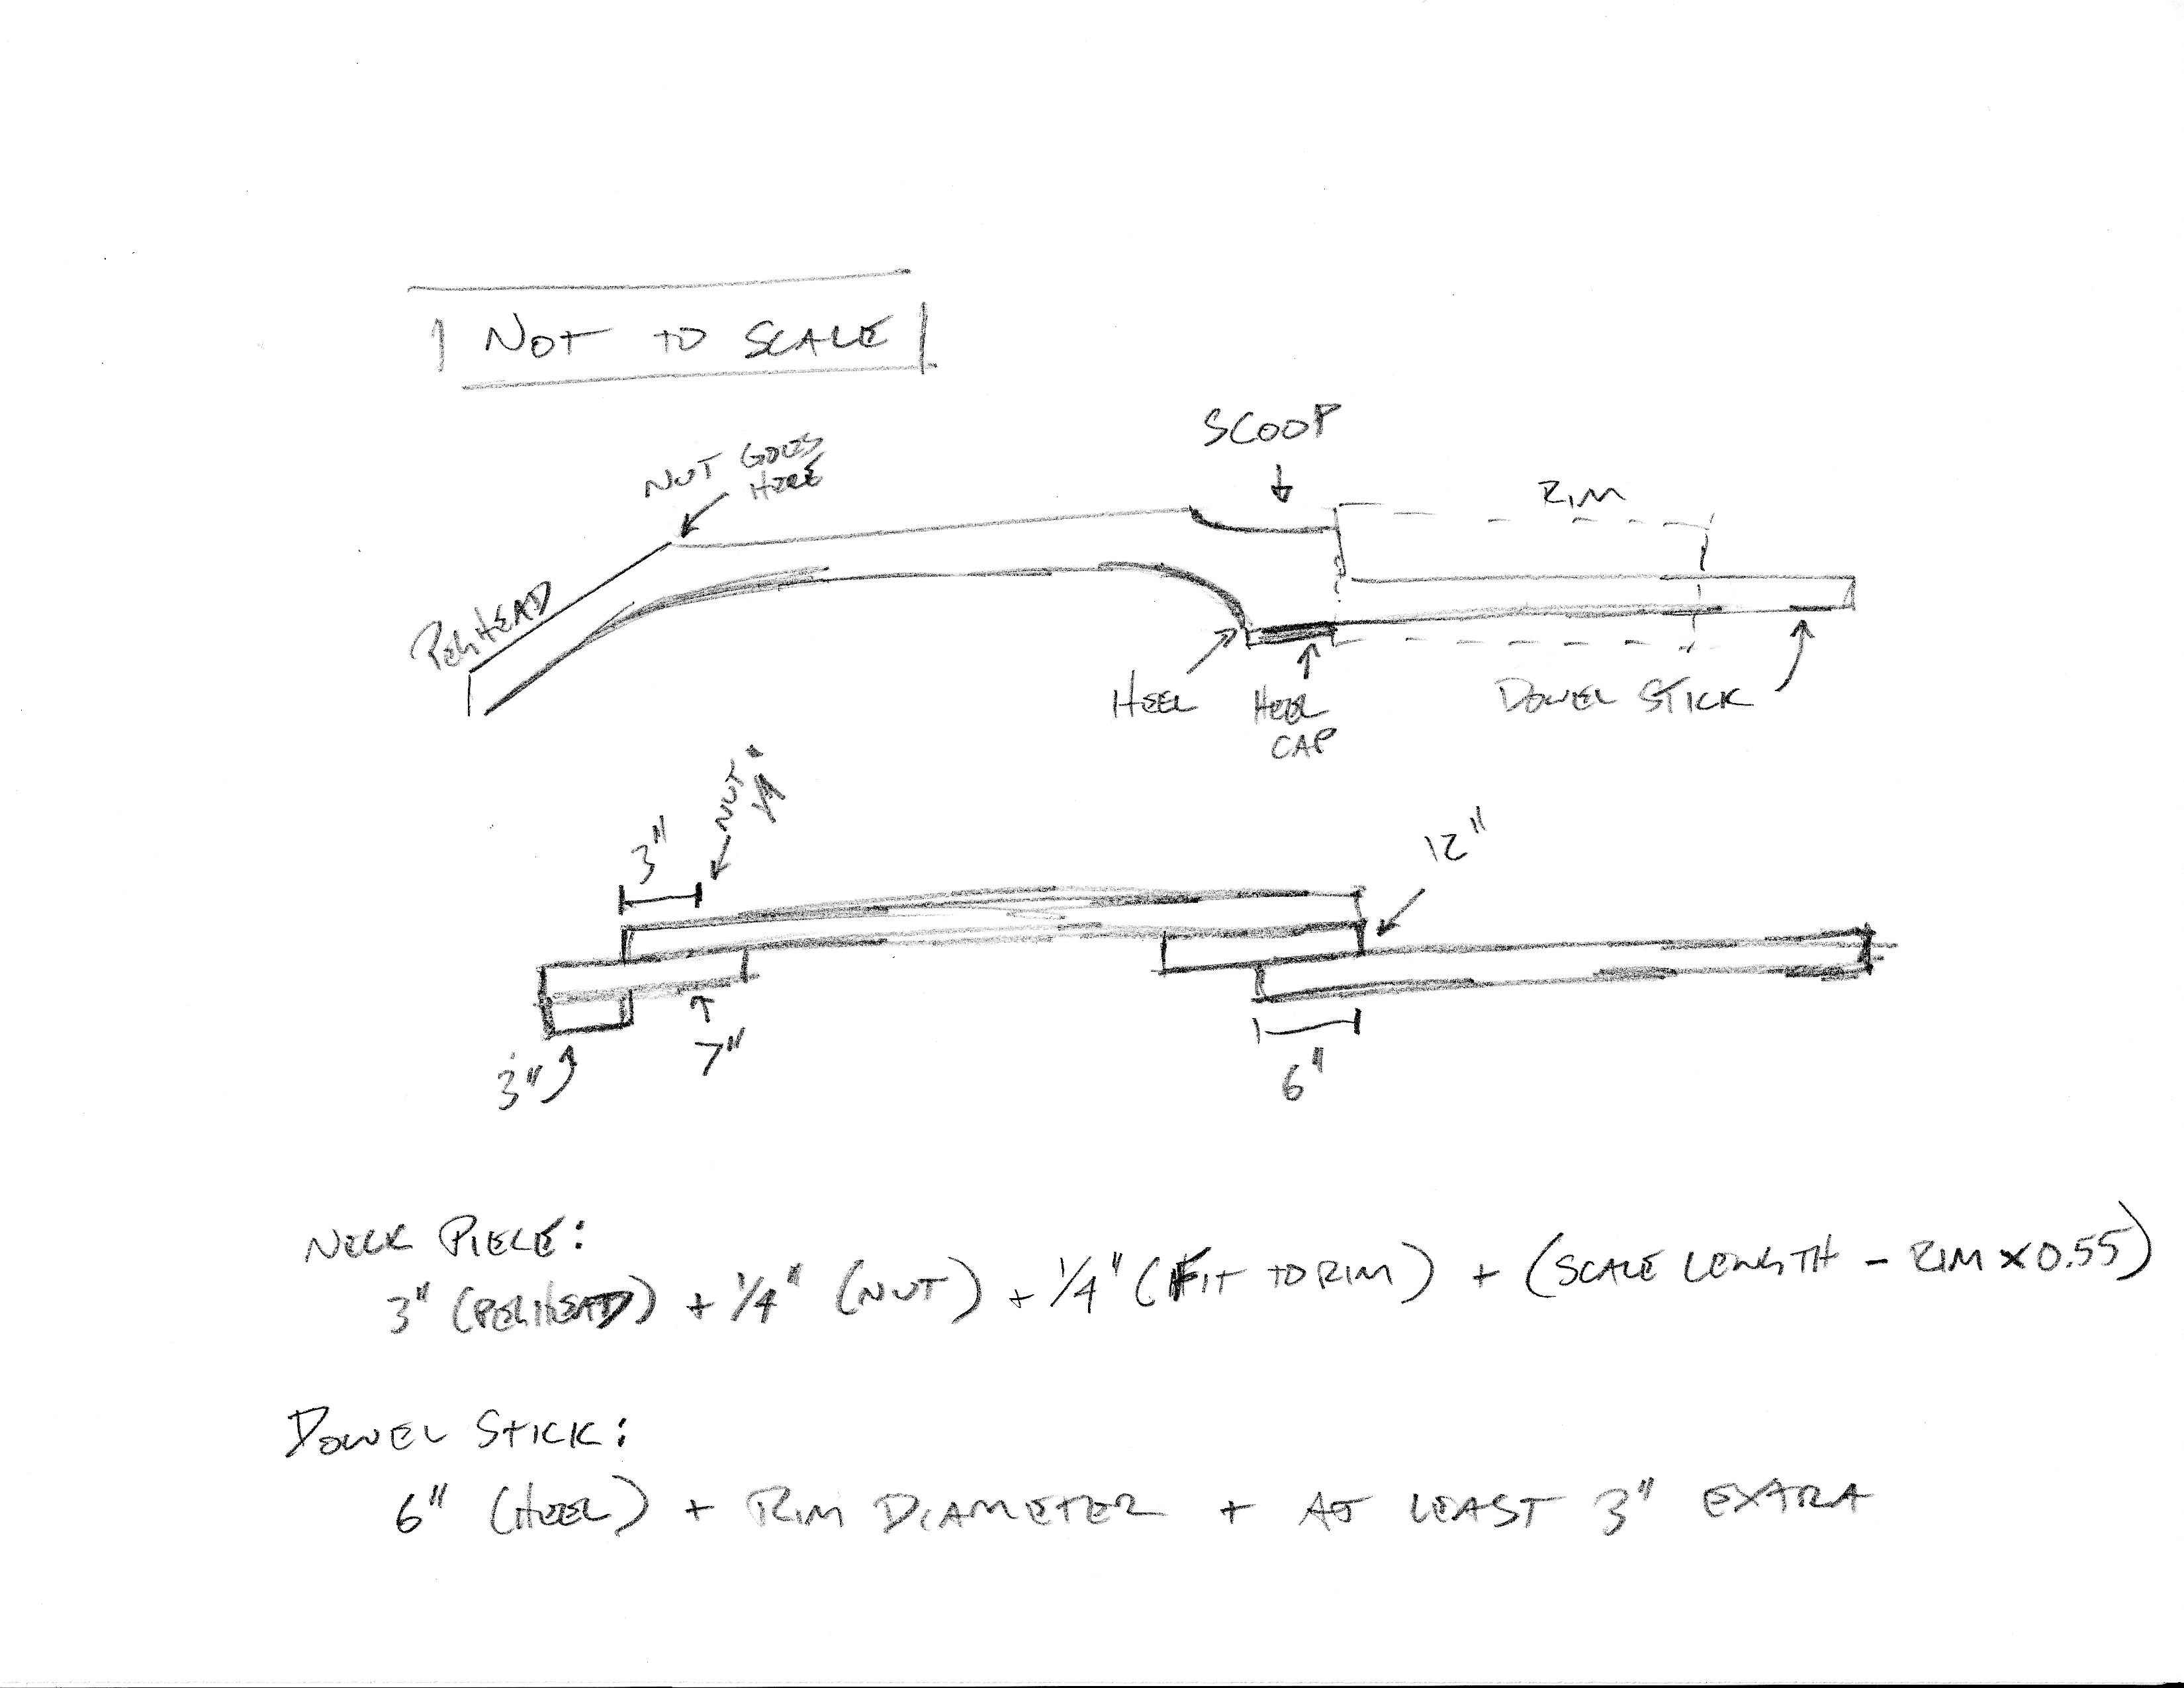
The main issue here is that two of the pieces are variable in length. The peghead will tilt back using a pair of smaller pieces (3” and 7”). The extra inch on that middle one allows you to carve out a smoother transition from the back of the peghead to the back of the neck. Some people like a bump there (a hand stop). The same is true for the heel end. The extra width from the 12” piece lets you gradually move into a steeper heel cut.
The piece that connects the bottom of the heel to the dowel stick is easier to calculate than the neck. You need about 6” for the heel (much of this will get cut off) and enough for the dowel stick to go through the rim and come out the other side. You want a few inches on the other side, even after all is said and done. That’s how the tail piece will attach to the body. In this drawing, I make this 6” plus 11” for the rim plus 3” to 7” excess. That comes out to 20” to 24”.
The neck piece itself involves some more math. The 3” by the head are part of the peghead. Then you have about 1/4” for the nut. (The nut is going to come from your fingerboard wood, unless you have another plan. It’ll stand up straight, so the width of the nut will be the thickness of the fingerboard.) Then, to figure out what’s left, you work backward from the scale length: the length of the strings from the nut to the bridge.
ADD PHOTO OF FINISHED PEGHEAD
START HERE
As mentioned above, most banjos are 26” or 27” in scale and you want your bridge just past the halfway point of the skin. 55% makes a good guess. So if your rim is 11”, just over 6” of your strings will be over the rim (11 x 0.55 = 6.05). That means that 20” of your strings will be over the neck.
This gives us a length of 3” (peghead) + 1/4” (nut) + 20” (scale) + 1/4” (for good measure, since we are carving some of the end out to fit snugly with the rim later). That equals 23 1/2”.
Layed out more neatly:
| Part | Length |
|---|---|
| Peghead tip | 3” |
| Peghead middle | 7” |
| Neck | 23” to 24”: 3” (peghead) + 1/4” (nut) + 1/4” (heel end) + (scale length - rim diameter x 0.55) |
| Heel middle | 12” |
| Dowel stick | 20” to 24”: 6” + rim diameter + a few extra inches |
Here’s the wood for two necks, all cut.
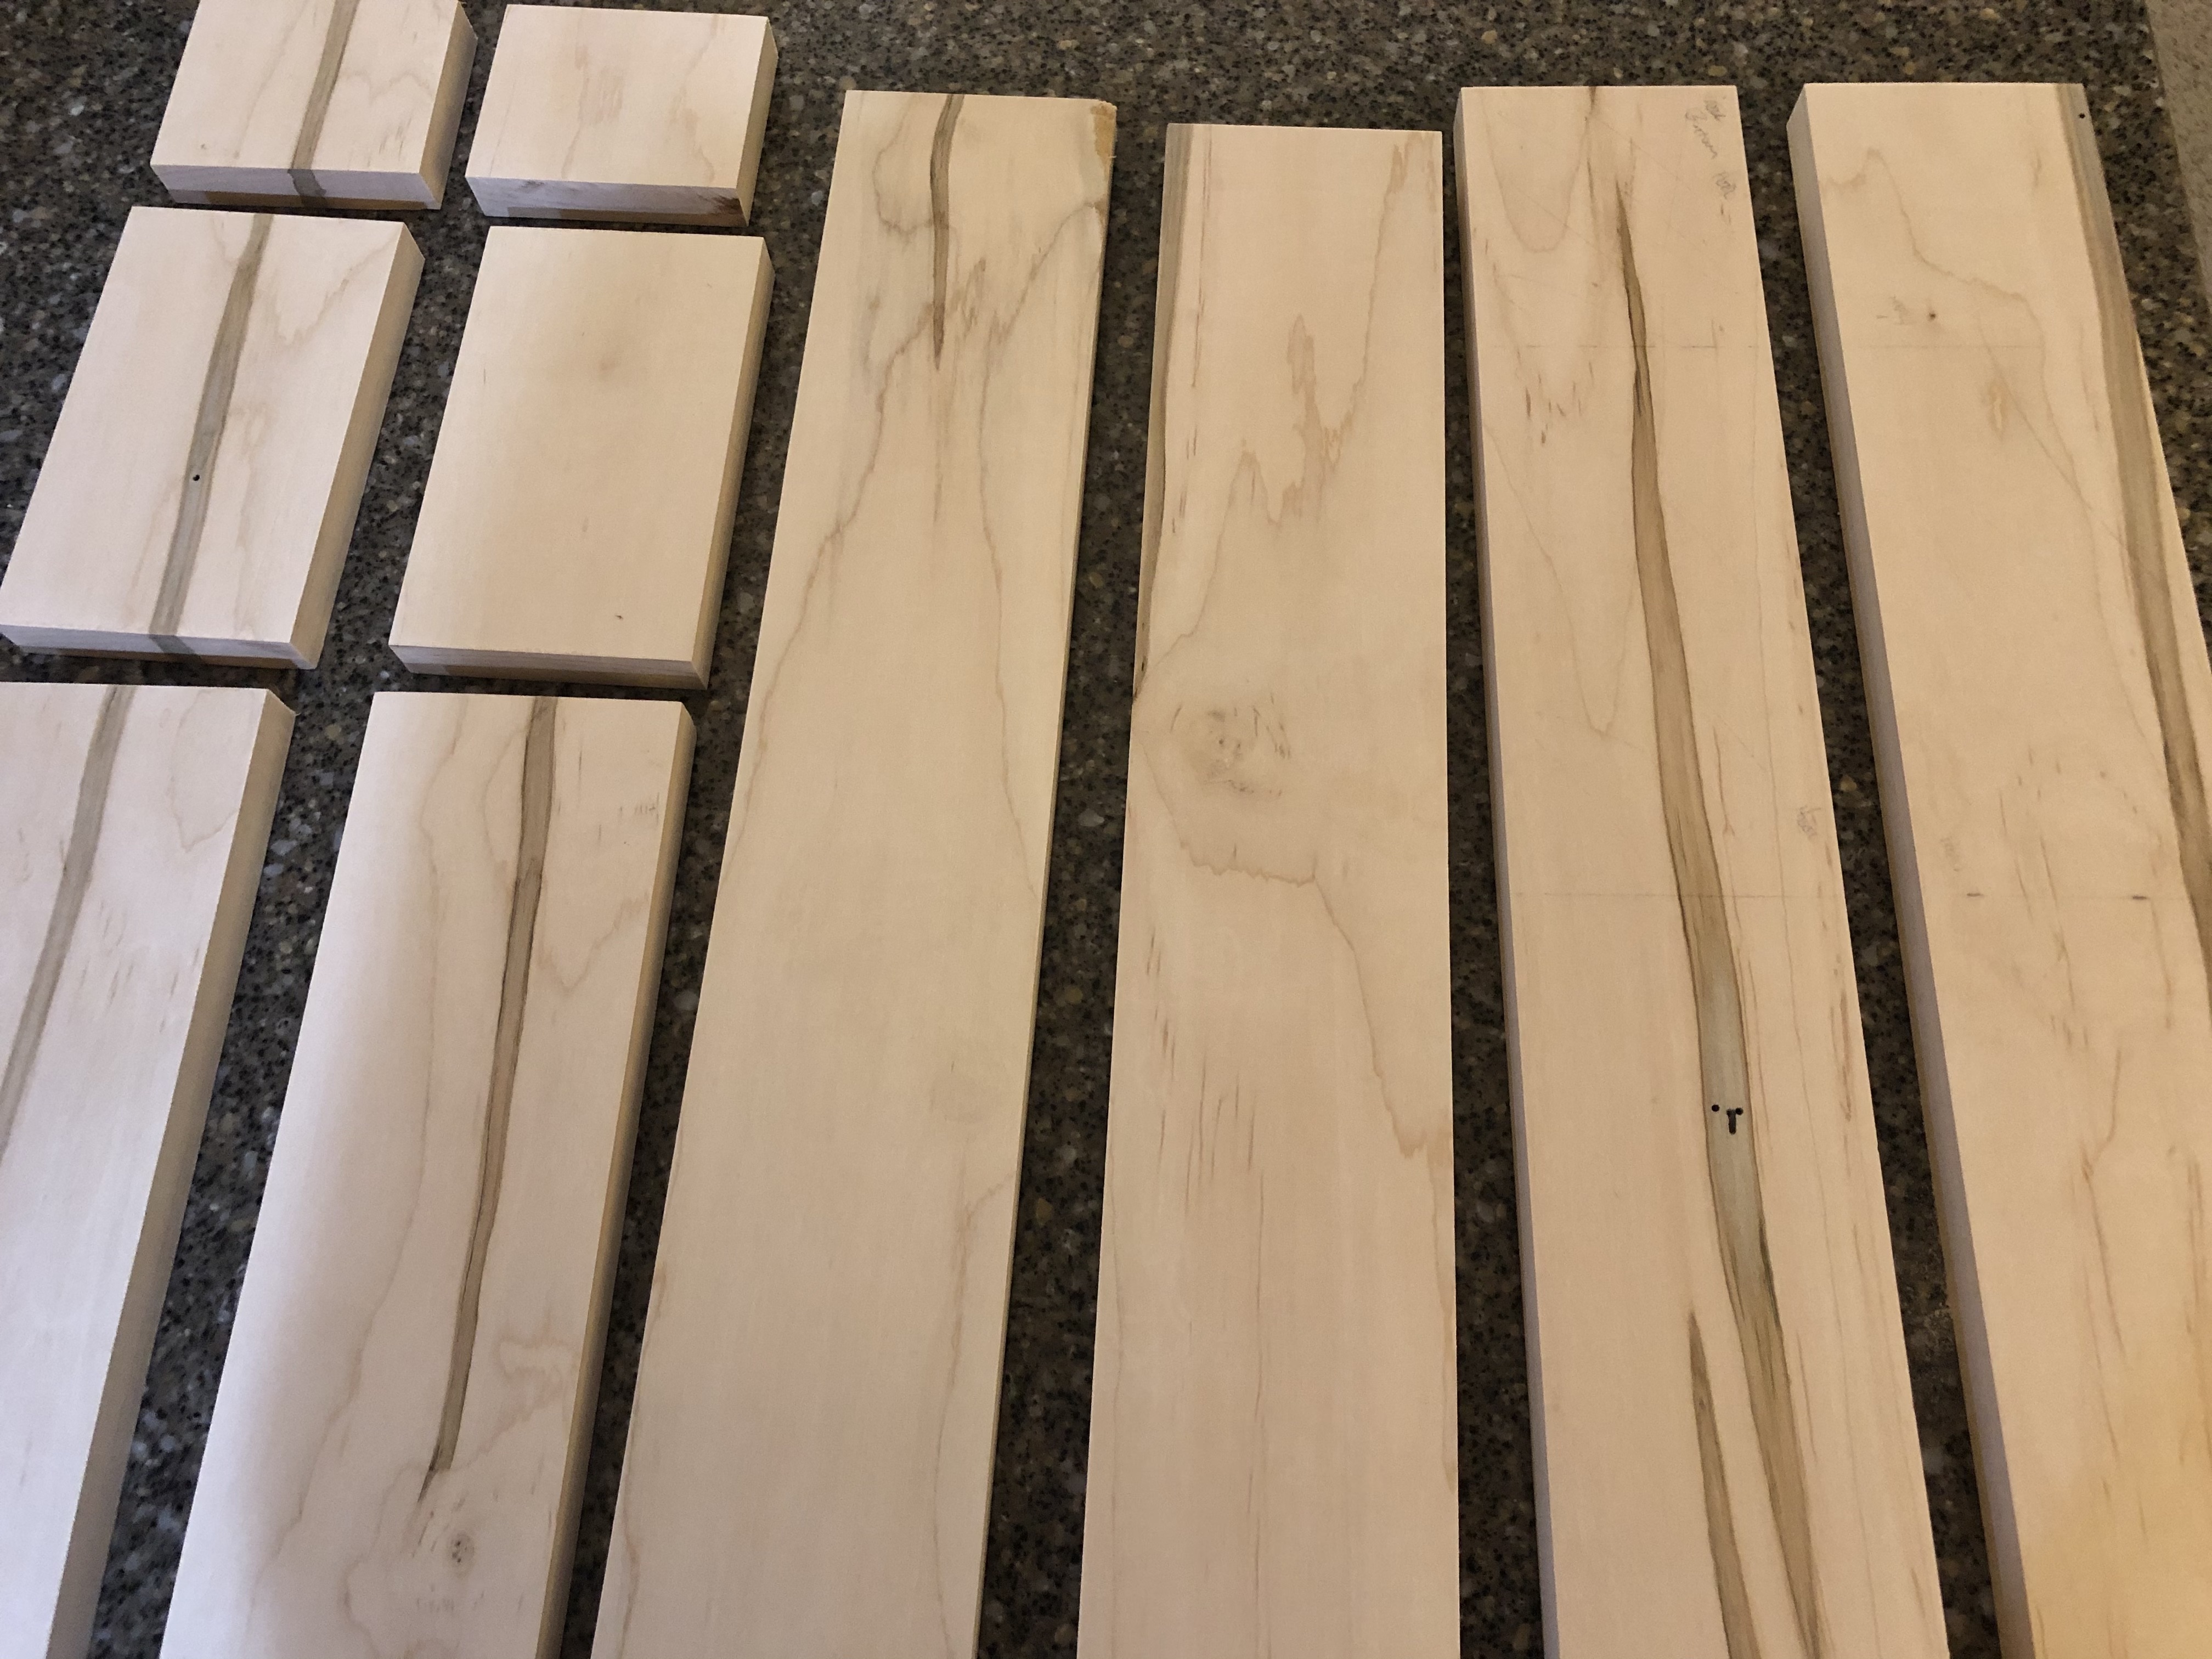
One last thing before marking everything up: this is the time to consider how the pieces will look when they are laid out. If you have something with distinctive patterning or grain, like the ambrosia maple in this picture, it’s worth taking a moment to look at it and see if there’s a way to make it work well for you. As you can see, it’s not perfect, but having the grain line up a little bit can make a difference. This is also the time to avoid any knots.

Gluing the pieces together
Before getting out the glue, be sure that all of the faces sit together perfectly flat. You may need to do some sanding or hand planing depending on the state of the wood. Nylon string banjos don’t have a ton of string tension, but you want these glue joints strong.
When you lay them out on a table to check, you can also write numbers and arrows to be sure that you join the right faces together when gluing. This is especially worthwhile if you took the time to line up grain patterns. Just draw lines on the sides and write all over the faces. It’ll all get covered in glue (more wood) or cut off.
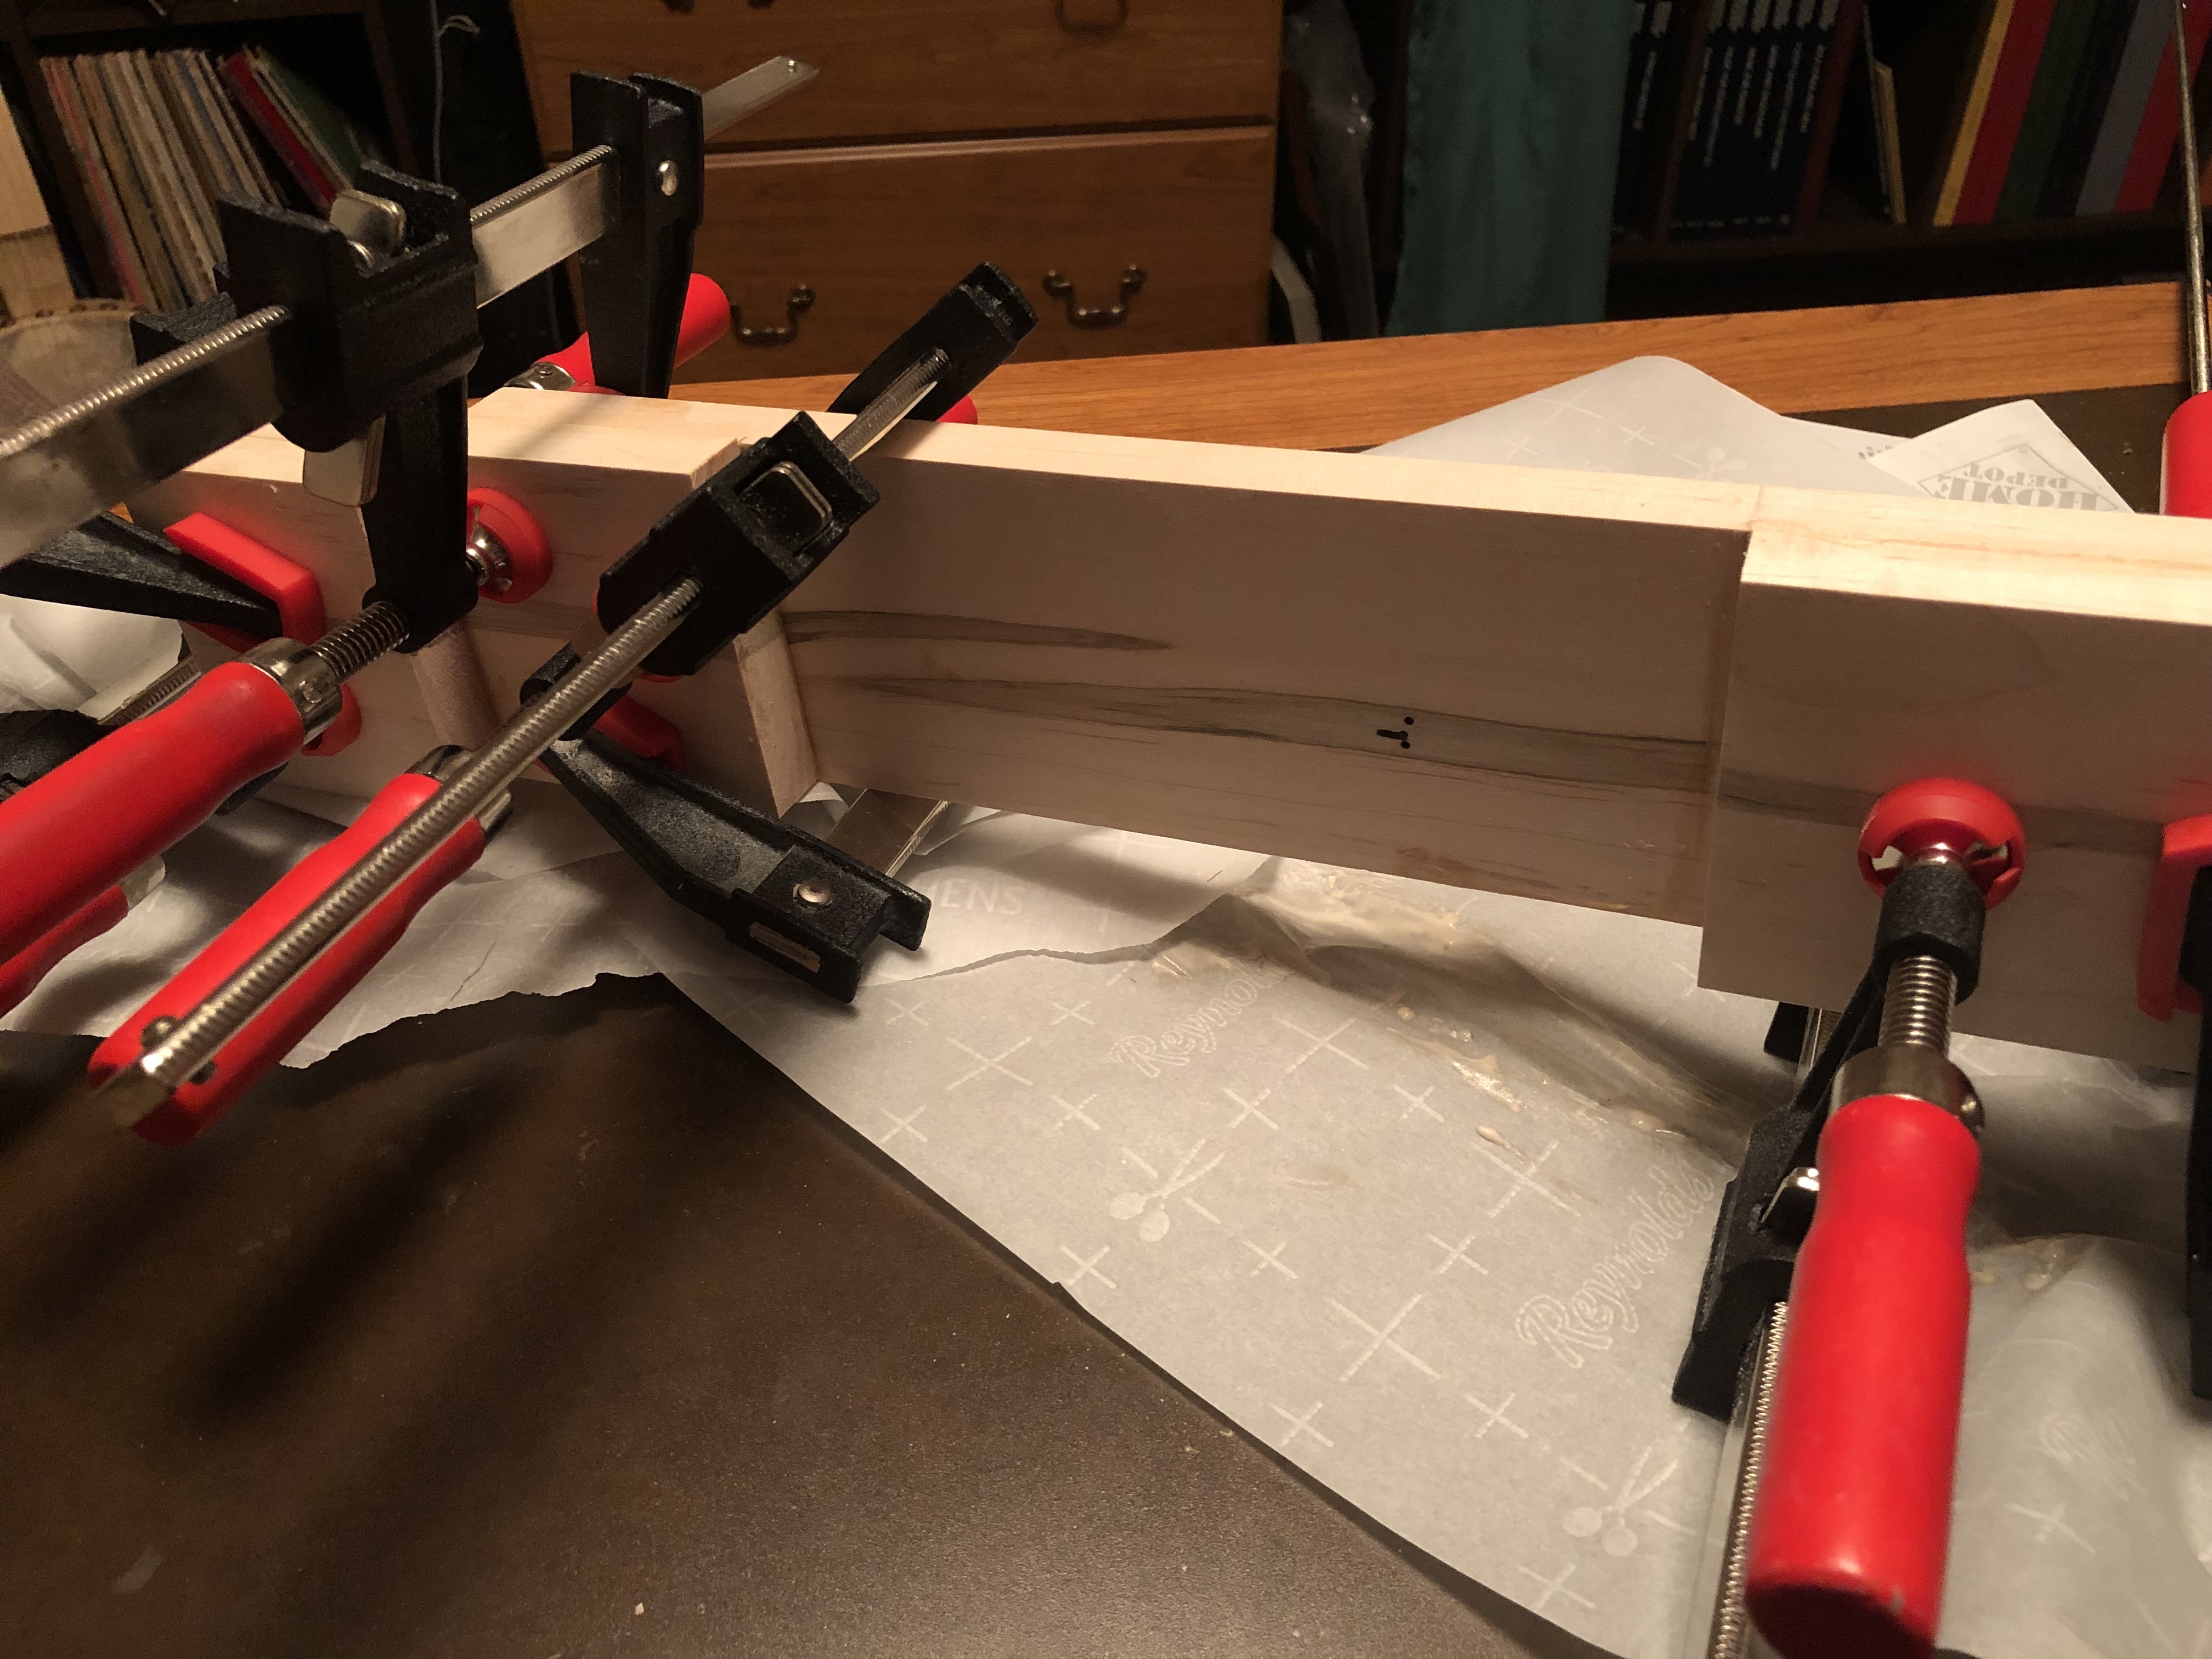
After “dry fitting” the pieces and rechecking them over and over, get out the glue and as many clamps as you can find. This will take a few days if you don’t have way too many clamps lying around. Do a piece or two at a time, crowd the clamps on to get it tight, and let it dry. Take them off, add another piece or two, and do it again. If the pieces don’t glue on perfectly straight, it’s not a huge deal. You’ll be cutting the neck out of this so all the edges will be gone soon anyhow.

Building the rim
A block rim is basically a stacked set of “laminations.” Each of these is an octagon (though you also see 12 or 16 segments). You can mismatch pieces to get a checkerboard pattern or use different woods for different laminations for stripes, rim caps, wooden tone rings, etc. There are a bunch of videos and examples around the internet, this is a distillation that I’ve used.
Cutting rim segments (the blocks)
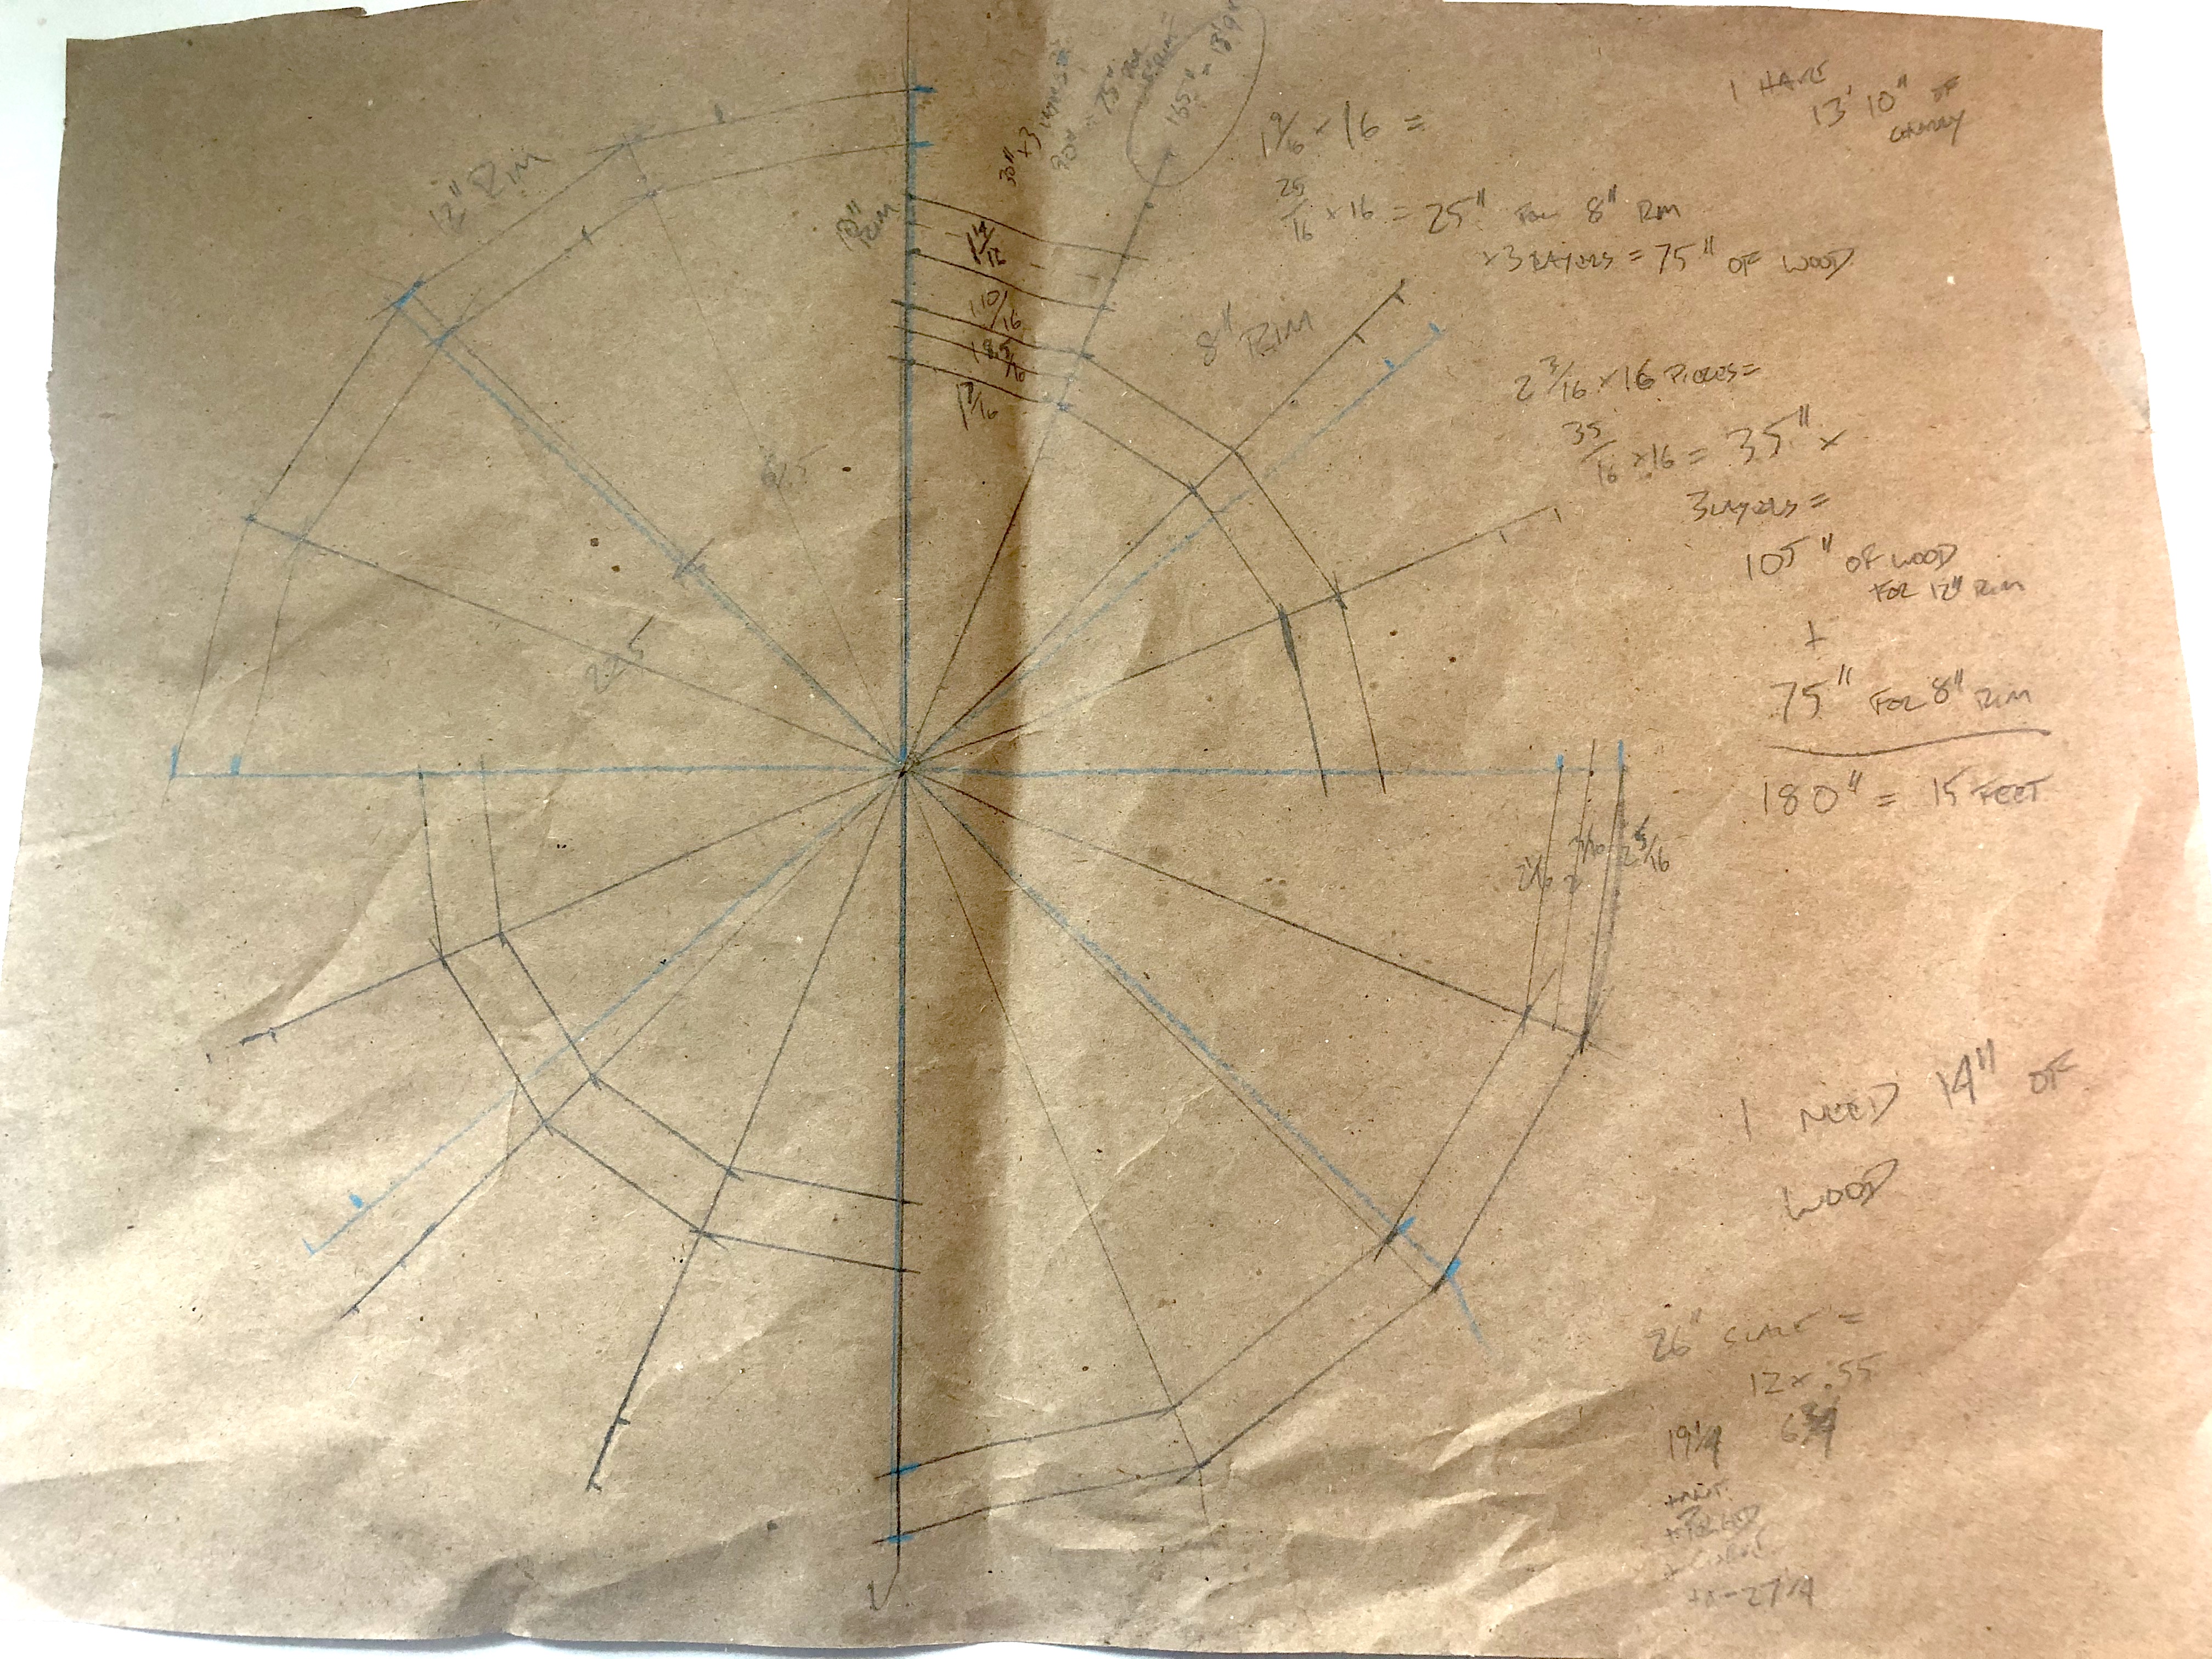
Splitting a circle into segments involves some math for angles. Look back at that layout above, that’s where these numbers below come from. You’re dividing 180° by the number of segments. I found it useful to draw up a plan: this is for a 16-segment rim that I hope to do sometime soon. There’s a smaller one in there for a banjo ukelele that I want to make for my kiddos. It’s hard to read, since I drew this out on brown paper, but it might be worth the time to sketch out what you’re looking for, especially if you are not doing an 11- or 12-inch rim. The measurements for those are below.
| Segments | Angles | Long side (11”) | Long side (12”) |
|---|---|---|---|
| 8 | 22.5° | 4 3/4” | 5 3/16” |
| 12 | 15° | 3 1/16” | 3 3/8” |
| 16 | 11.25° | 2 9/32” | 2 1/2” |
These are the angles for your trapezoids. The lengths are really specific. When all is said and done, it’s most important that the angles are right and that the segments are all the same size. If they are a little bigger or smaller, it just means that your hoop will be a little bigger or smaller. That doesn’t matter at all.
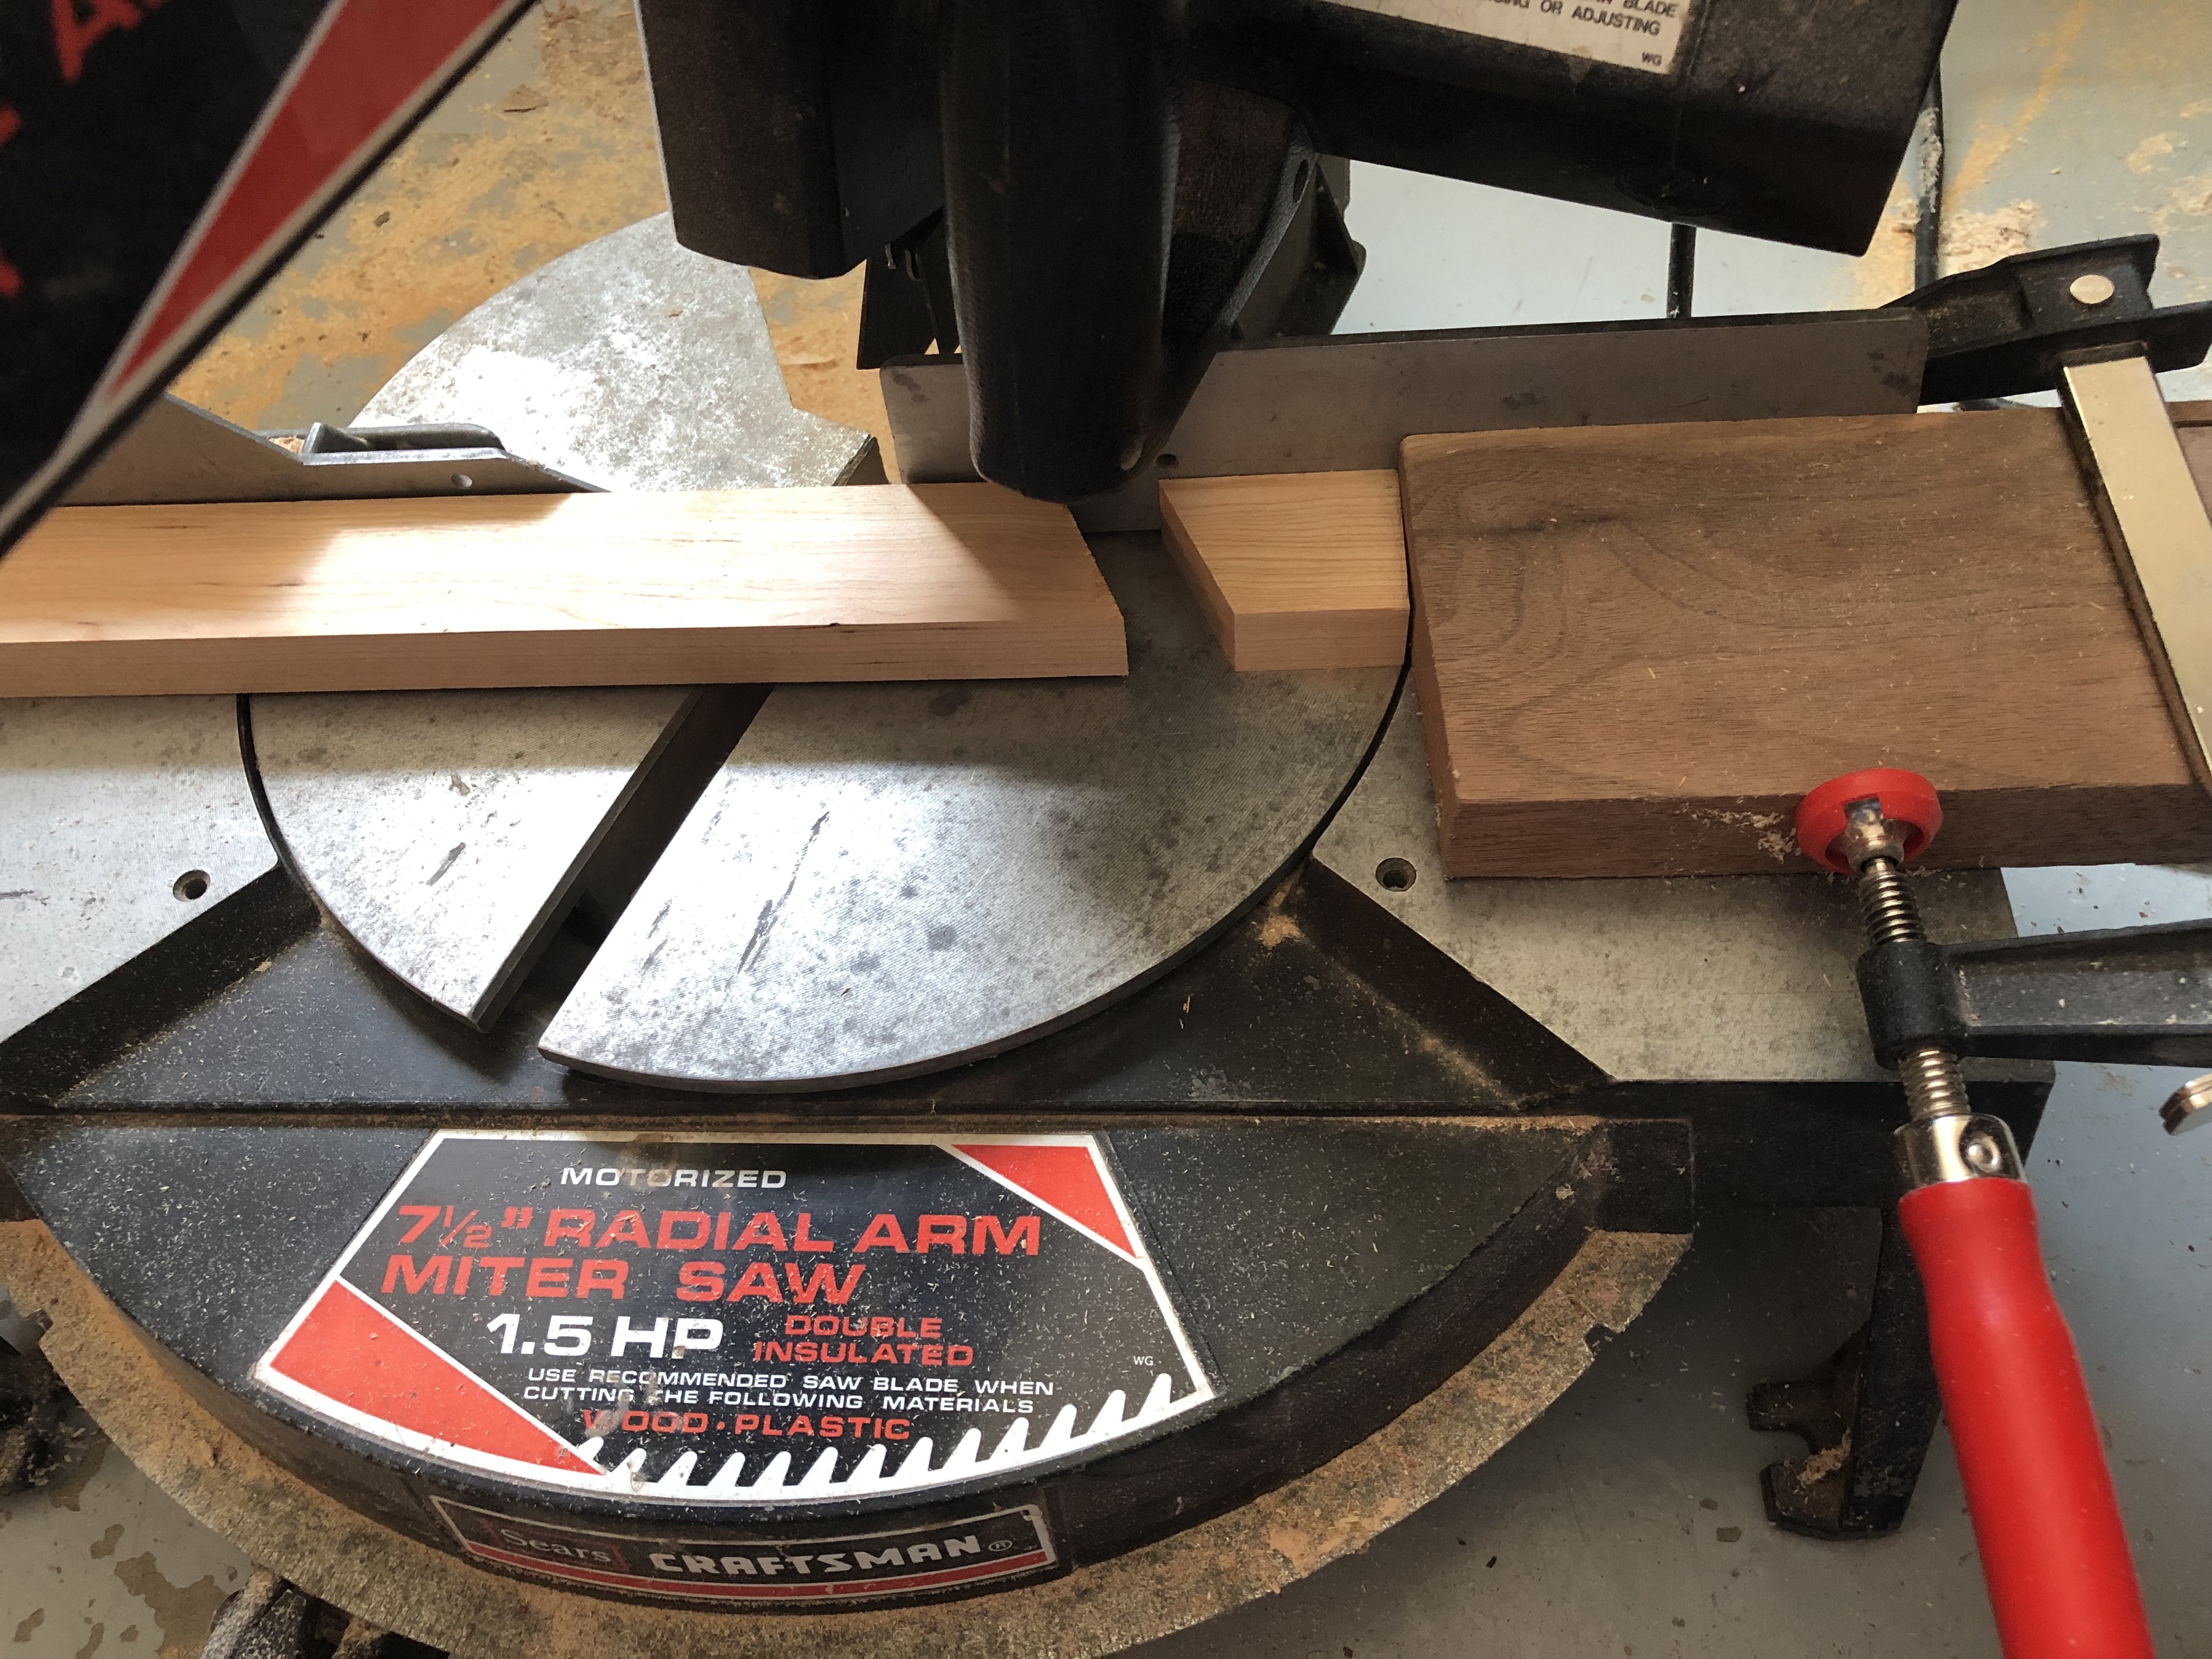
The easiest way to cut them is using a chop saw, mitre saw, or radial arm saw. Basically, a tool that makes repeated identical cuts easy. Do this once with a test piece of long scrap, if you have it.
First, set the angle and make one cut to get the end off. Then, you can use the angled side of that end piece as a block so that each other piece is identical in length. Do this by flipping it and clamping it to the saw itself. The piece I cut for this photo was a little short, so I clamped another scrap as a stopper.
From here, you just flip the stock (the long wood you are cutting) to align with your block, slide it down, and make the next cut. Take it off, flip the stock, slide it down, cut.
When you get half of your segments for one of the laminations, lay them out on the floor. They should make a half circle. You can check by lining up a straight edge (a ruler or the long piece of wood that you’re cutting). If it’s way off, you’ll want to adjust the angles and redo them. You can cut these a bit shorter (shave off the angle) and make a smaller rim if necessary. Since you’re hopefully working with scrap, that’s not a problem. A small half circle will give you the same angles as a large one.
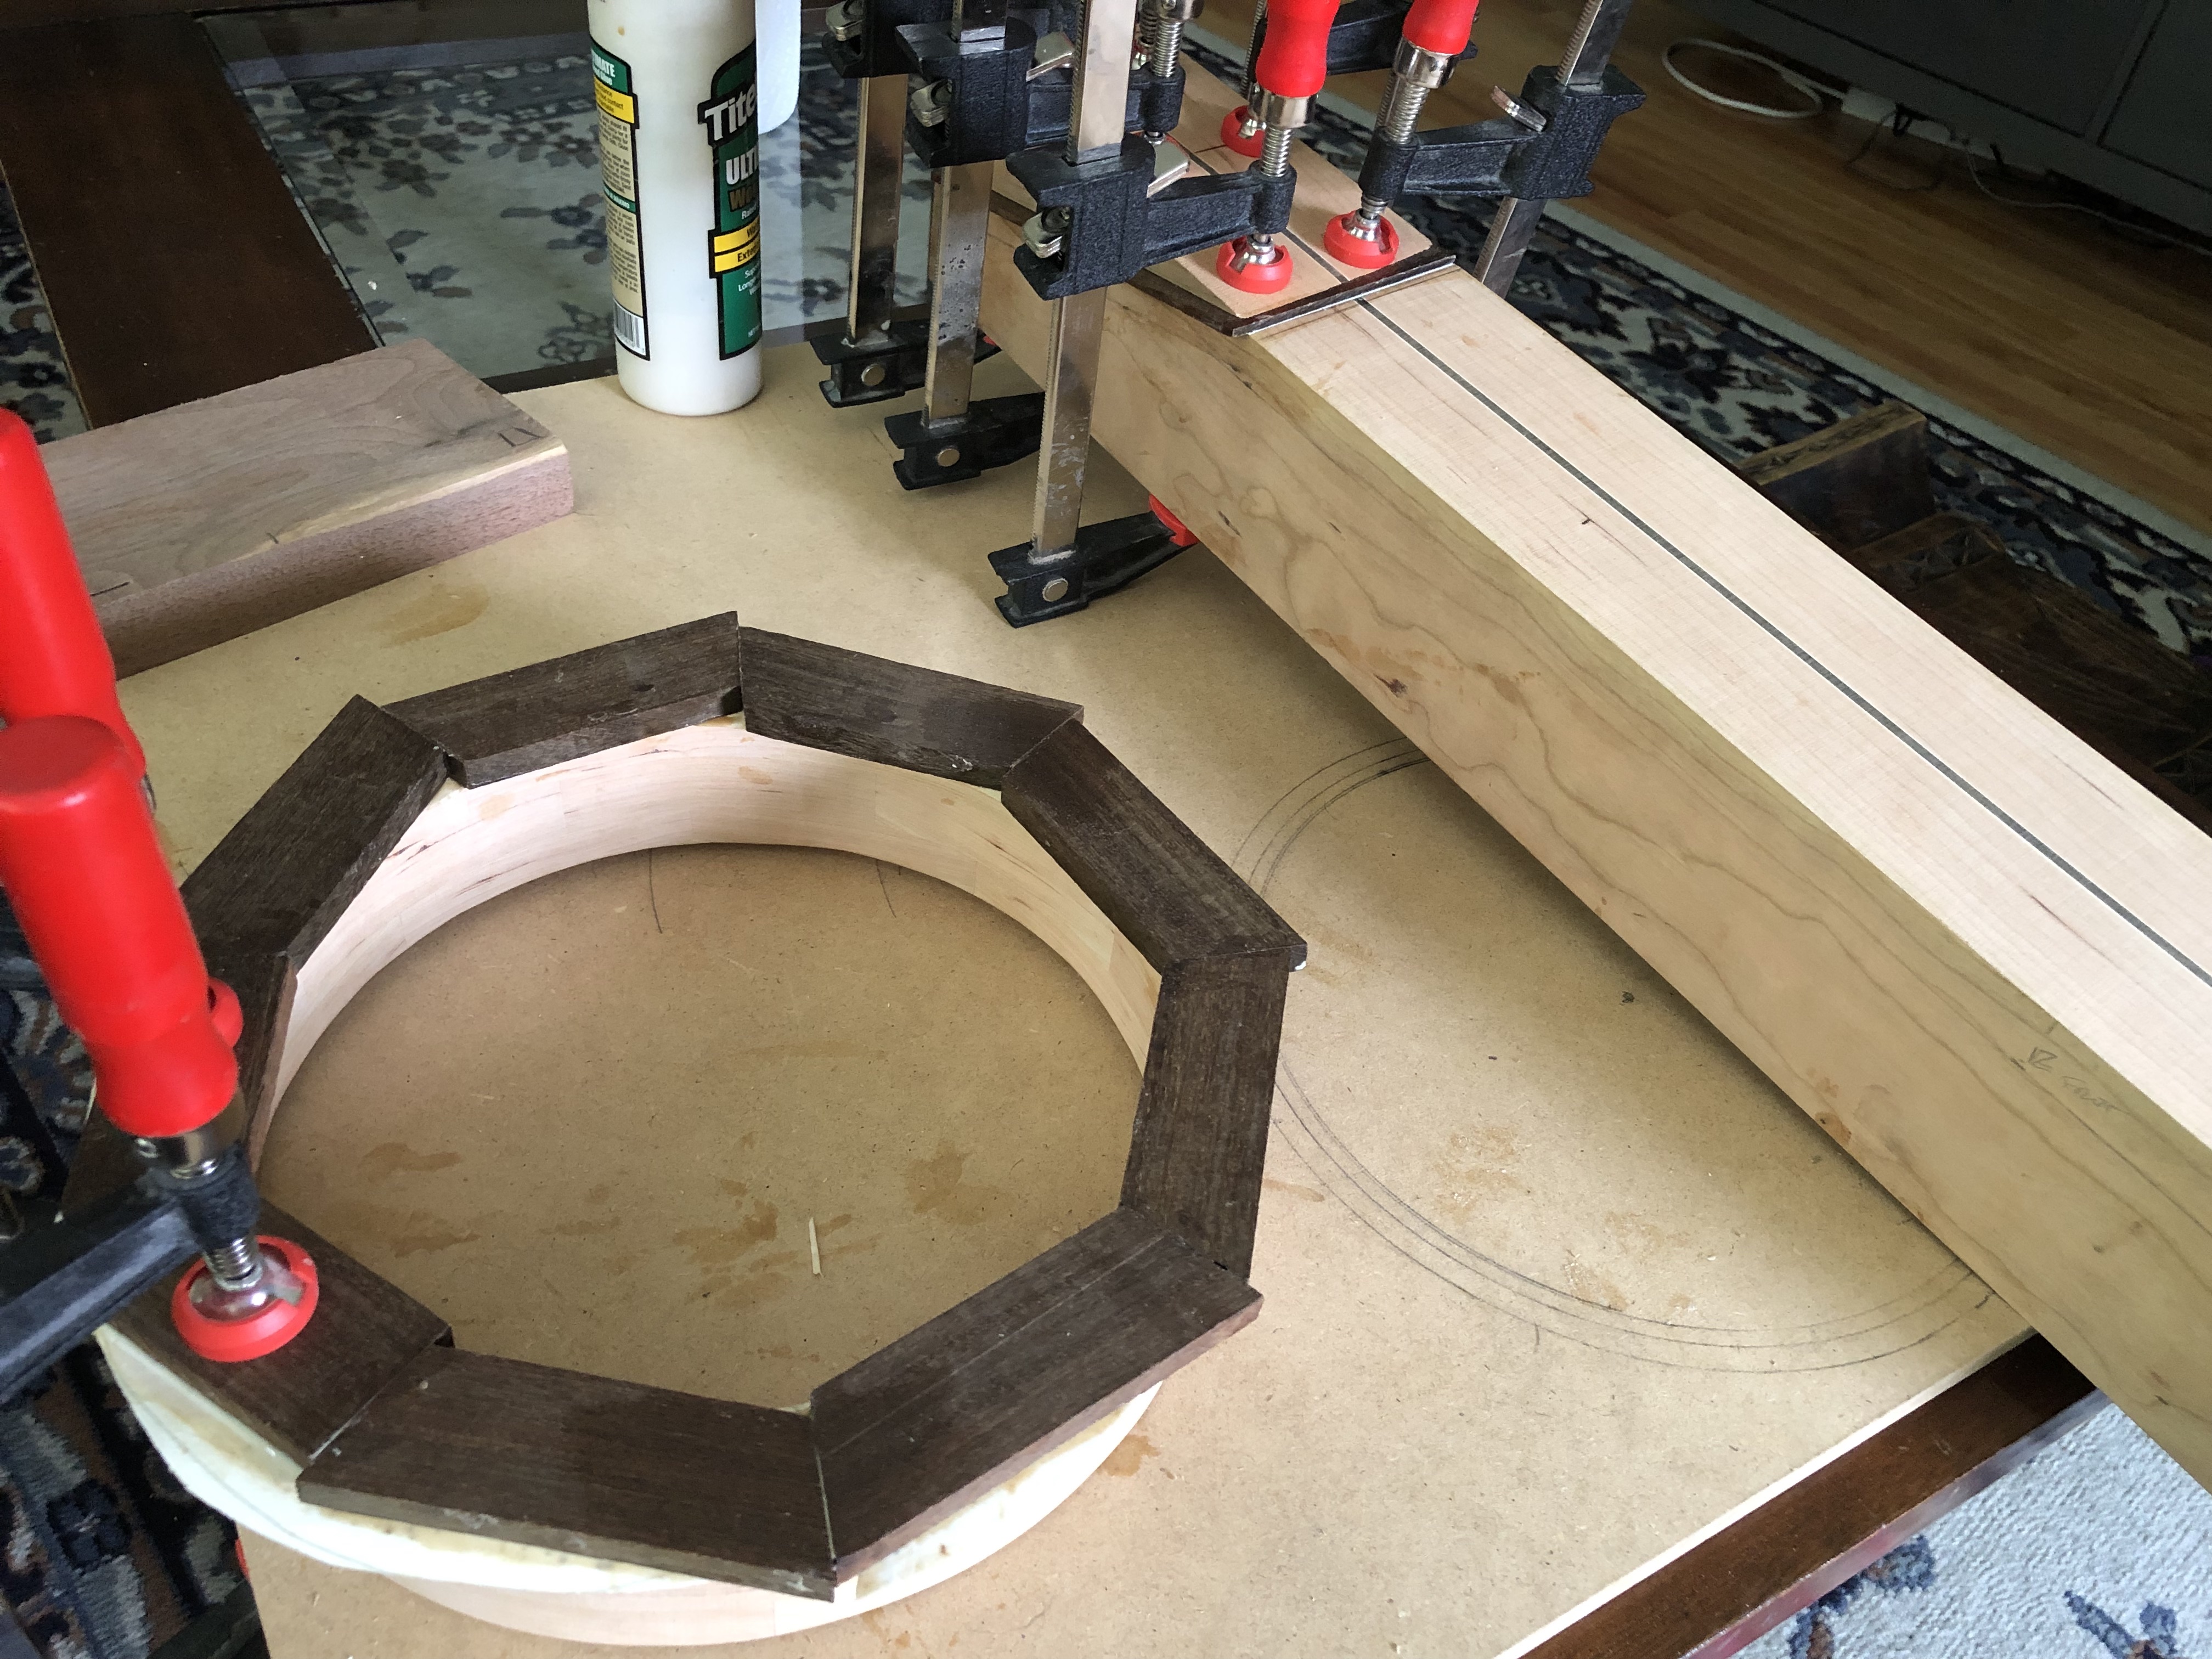
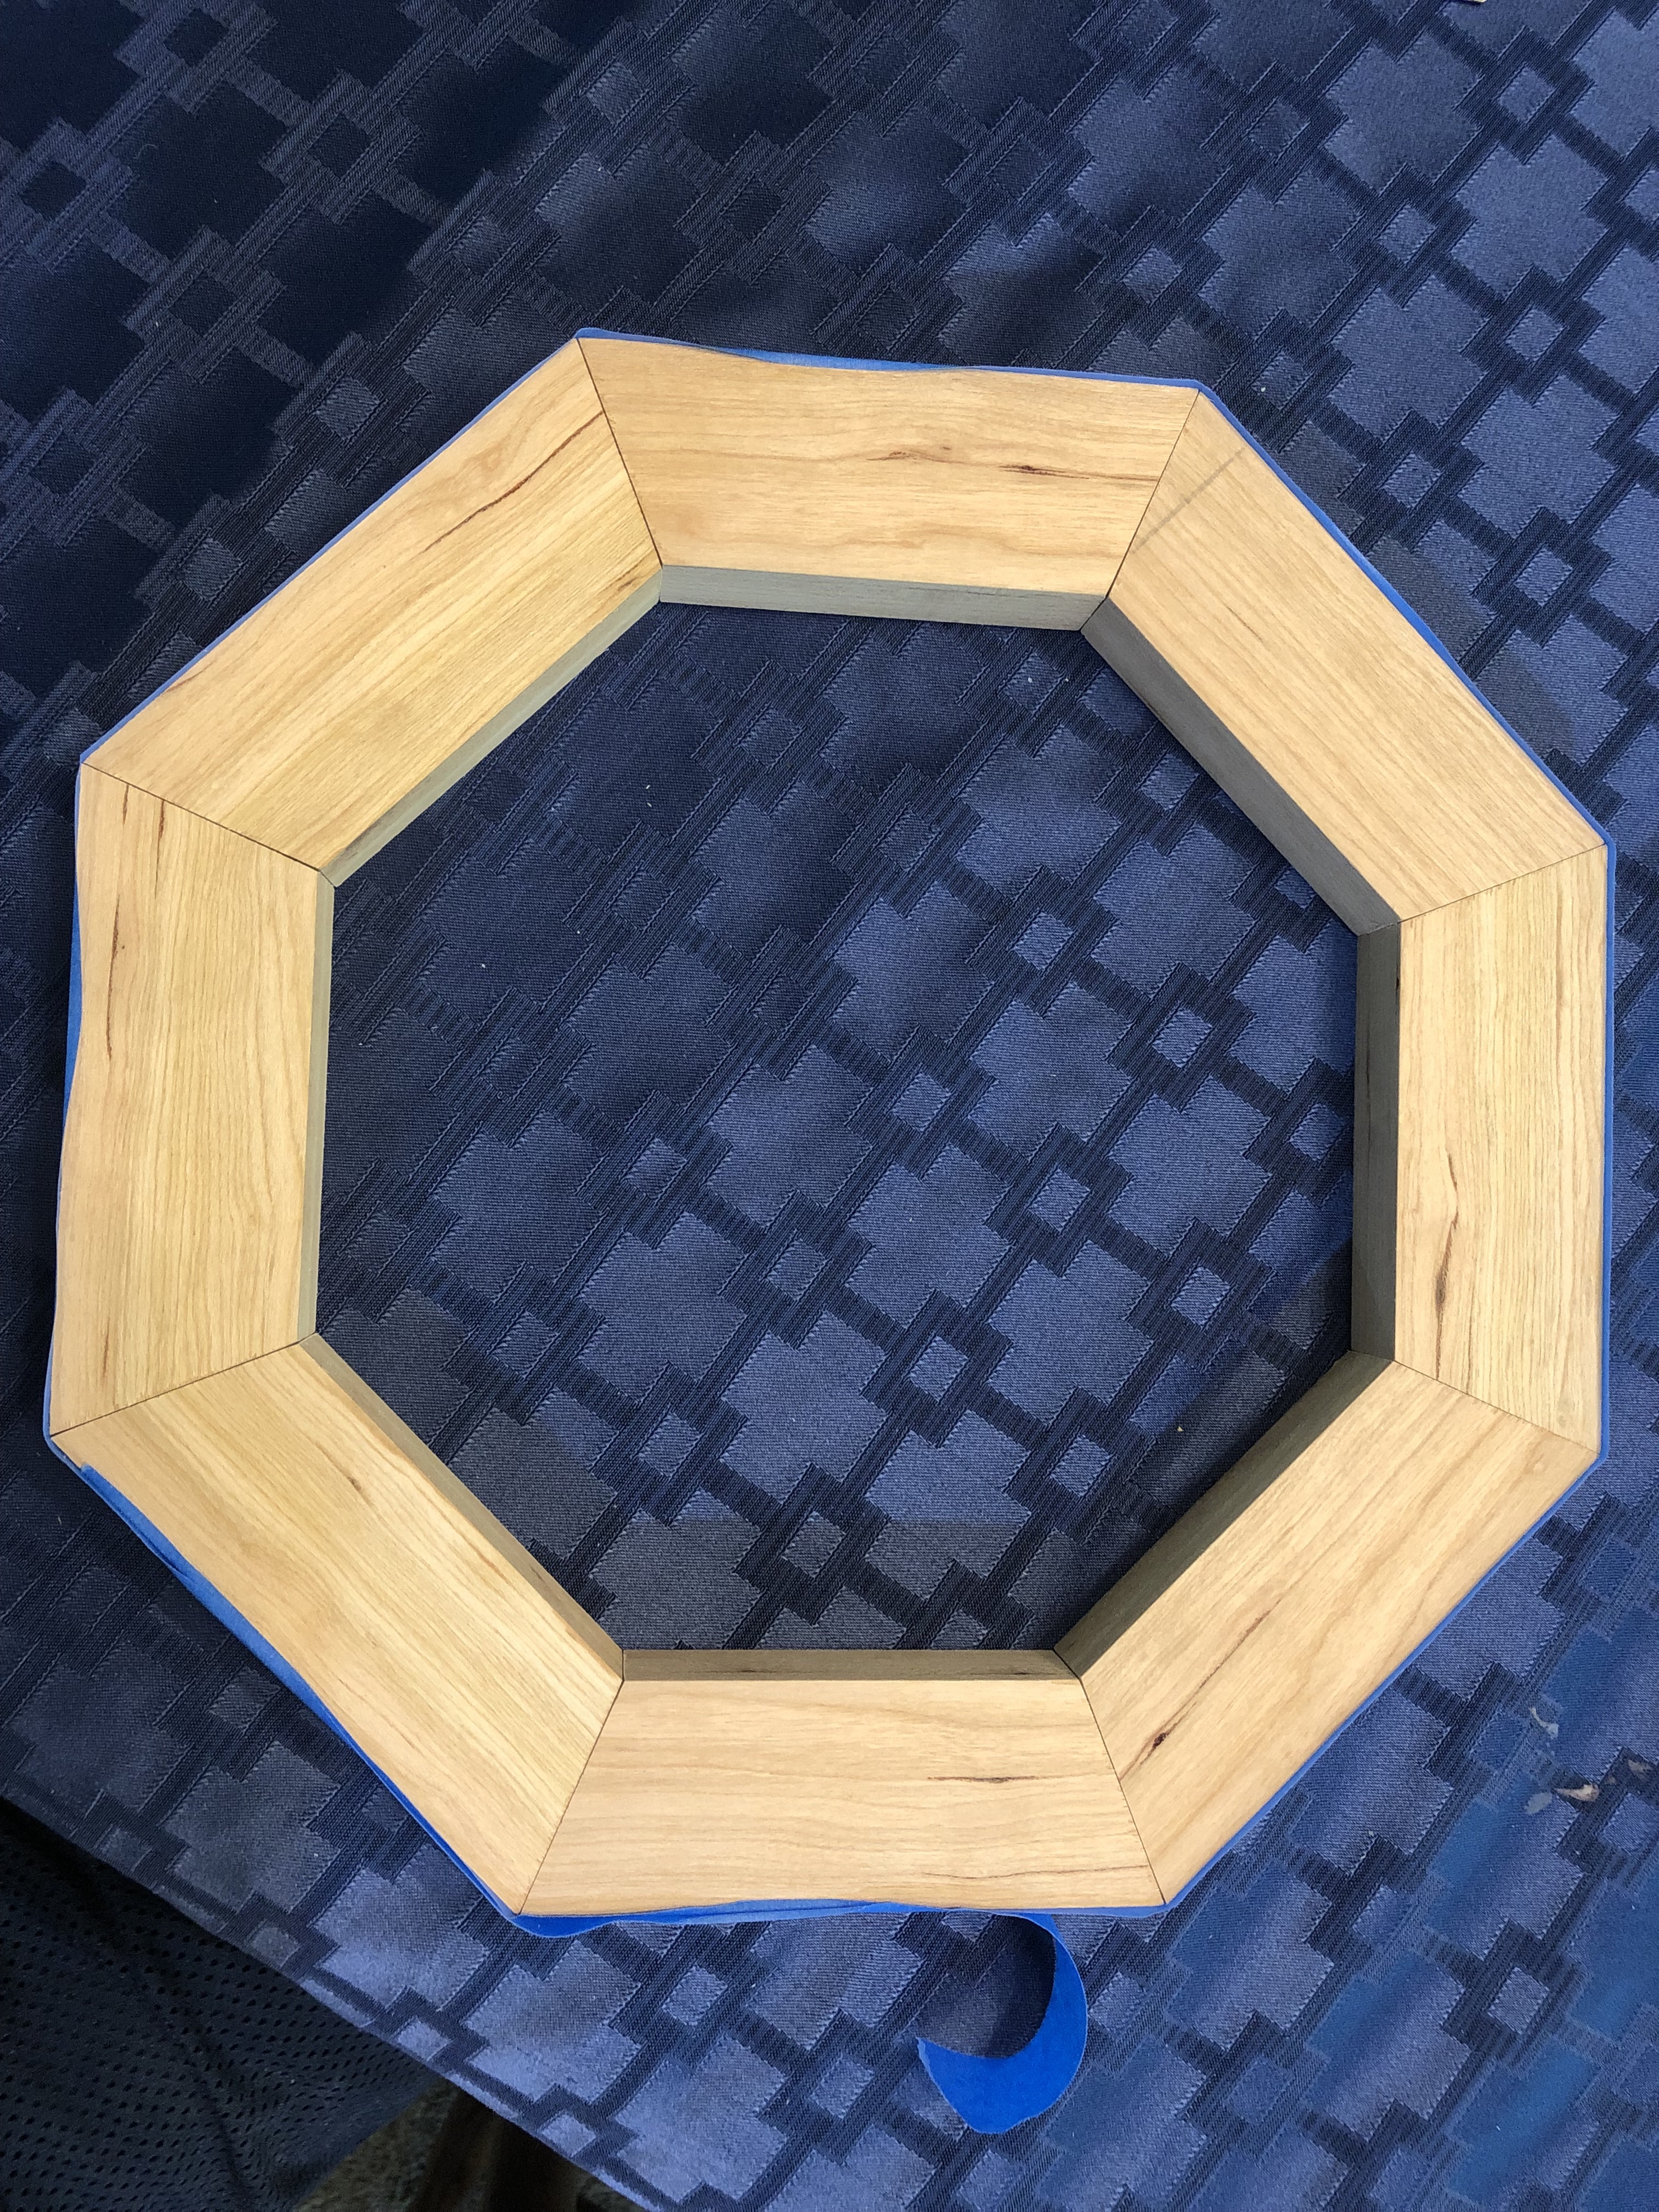
Once you’re set, get your regular stock (or put it back on) and keep cutting. If you are doing 3 laminations of 8 segments, you’ll need 24 of these segments. Lay out and check your octagons as you go. The description of this process at Bluestemstrings.com suggests leaving the last segment a little long so that you can adjust it to make everything else fit. I had not seen this before and will probably try it out the next time around, I bet it will save some headaches. (This next photo shows the segments glued and taped, which comes in a moment, but it shows the general idea of how the alignment works.)
If they are off by a little, you can shave off the difference in a few ways. One that I remember from the many YouTube videos I watched involved a table saw, where you basically lay out the two half circles and cut their ends flat so that they mate well. Drawing a line with a straight edge and cutting with a hand saw should work, too. Be careful of sanding since you can end up with rounded edges. This would mess with your gluing surface.
Gluing the laminations
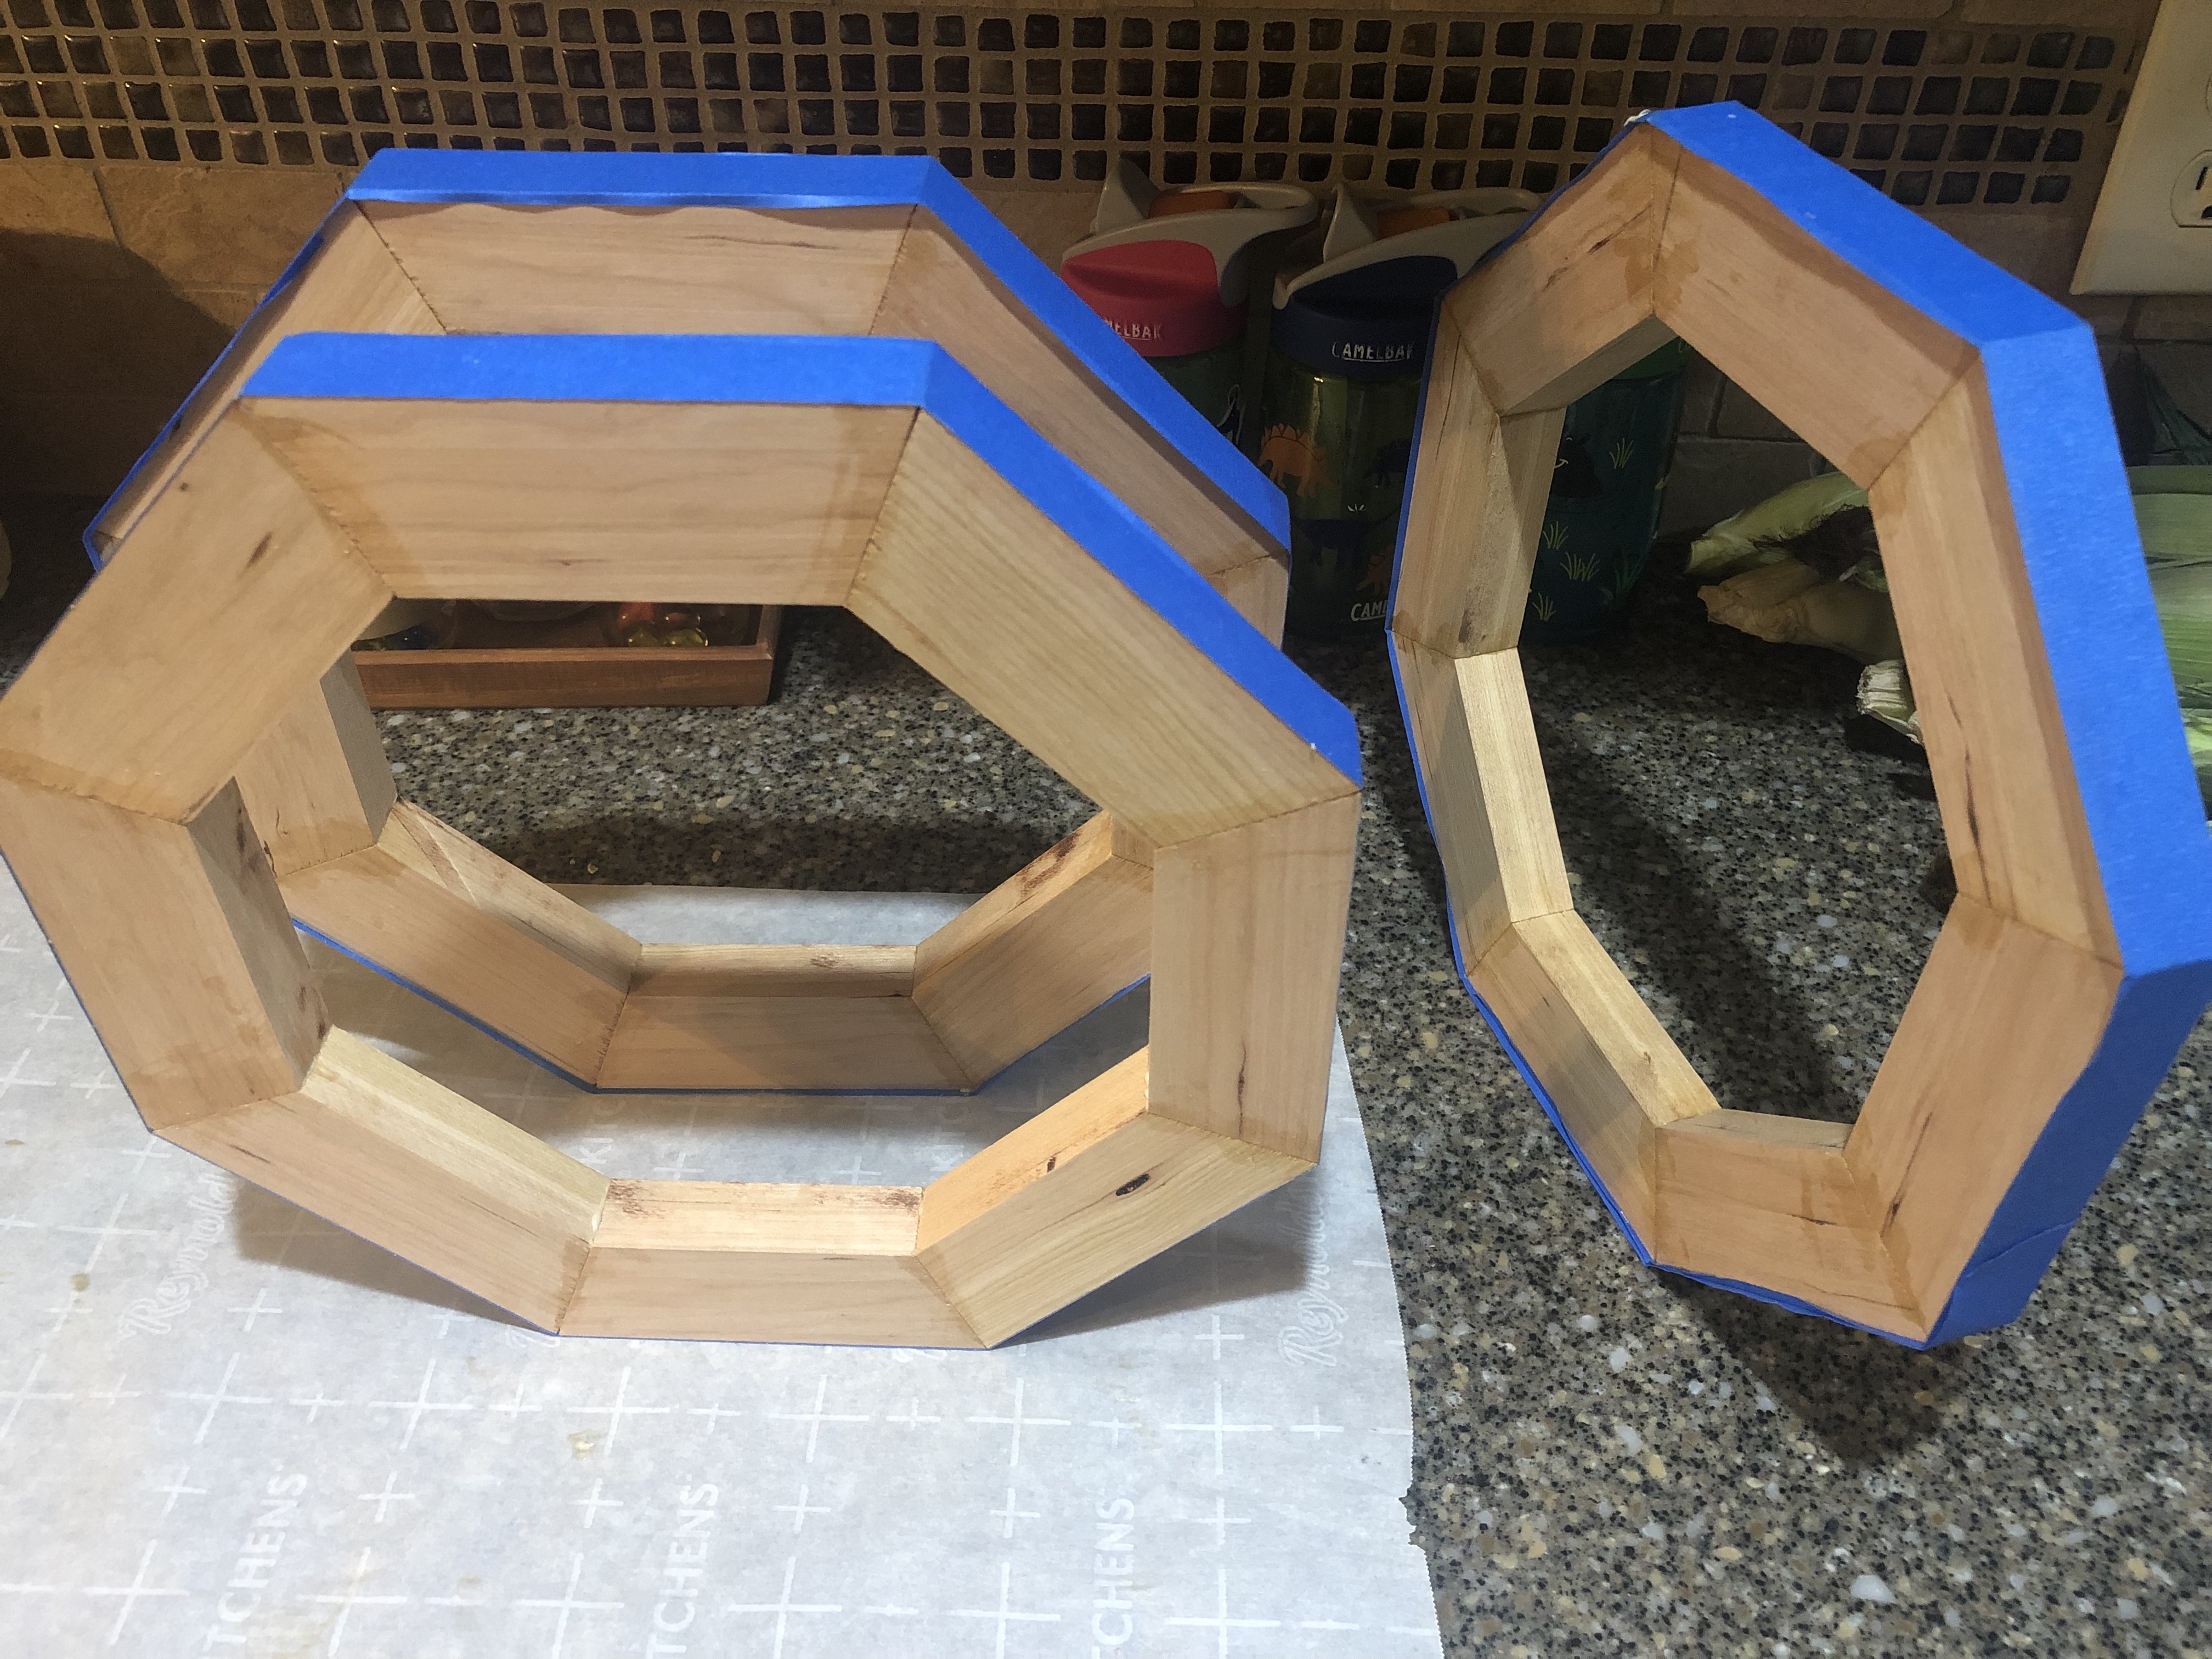
Once the blocks are cut and you know that they fit together well, you can glue them together. One easy way to do this is with blue painters tape.
Lay the blocks for one lamination (one layer) out on a table on their long edge, end to end. This gives you a chance to practice lining them up as closely as possible. Rip off a piece of painters tape that is a few inches longer than the line of blocks. Starting at one edge of the tape, stick the blocks end to end as close as possible. You’ll use the few inches of tape to hold the octagon (or whatever) together after gluing.
Practice rolling it up and taping it shut. The blocks should line up perfectly. If they are jagged at all, fix it. You can use one edge of the tape as a guide. If any are out of “true” or straight, you’ll have to sand the entire layer of rim down to accommodate the gap. It’s an easy thing to get just right and it’s worth the time.
Once you get them exactly right, you add glue into both sides of each glue surface (where adjacent blocks will touch). Use your finger to spread the glue across the end grain of the wood so that it completely covers both sides of the gap. This may mean you have to lift the blocks a bit by grabbing the tape so that you can get right into the edge of the corner between the trapezoids.
Then, roll it up, use the end of the tape to hold it nice and tight, wipe off any excess glue, and leave it to dry overnight. Do it all again for each layer. If you are going to do a cap on the rim (a layer that’s a different material), this is the time to do it. The second picture below is from a time when I wanted to add a layer later on. It turned out to be a tone of awkward extra work since I couldn’t get the trapezoids to align exactly correctly.